Creating Groups
Target Audience: Teachers (Buzz)

Why Create Groups?
A teacher can group students in the same class in various ways to meet different needs.
- Groups are used to address most accommodation needs as well as needs for late starting students.
- Groups are all about individualizing and differentiating for individual student or small group needs.
- Groups can also be used to improve the monitoring of students in team teaching scenarios.
- Groups can be used for communication.
- Lastly, groups can be used to filter the Gradebook and People views.
How to Create & Manage Groups
Teachers can create and manage groups from either the course People view or Editor. The directions below describe adding via the Editor, but the directions would be the same via the course People view with the difference of selecting the People icon rather than the editor icon.
- Select the pencil (Editor) icon associated with the course from your Teacher App homepage.
- Select the wrench icon » Manage groupings.
- Select Add Grouping prompt » a pop-up window appears.
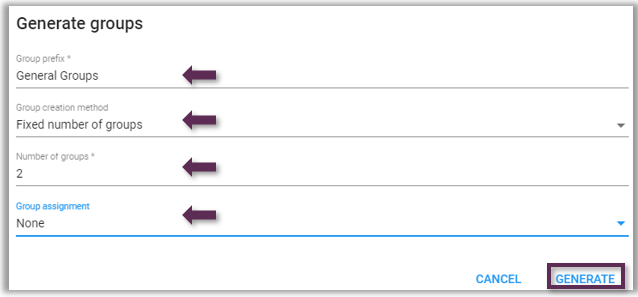
Warning: A grouping is a Group Category, not an individual group. You are likely to add all your groups to one grouping or category. This makes working with groups more efficient, as all groups are visible on one screen. - Set the Group prefix as General Groups.
- Set the Group creation method as Fixed number of groups.
- Set the Number of groups at a minimum of 1, but we suggest at least 2. Groups can be added to the grouping later.
- Set the Group assignment to None.
- Select Generate
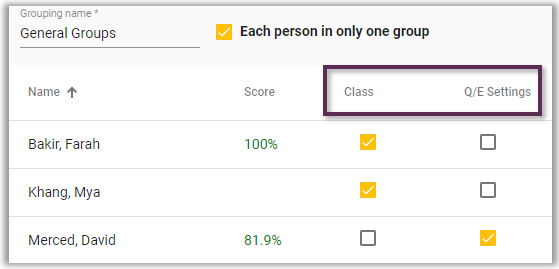
- Select the pencil icon to edit the group names to be meaningful but FERPA friendly » and then OK.
In the example below, the two groups are names Class (for students not receiving alternative assessments) and one labeled Q/E Settings (for students who either need alternative assessments or different assessment settings). - Add students to the appropriate group by checking the box associated with both the group and student.
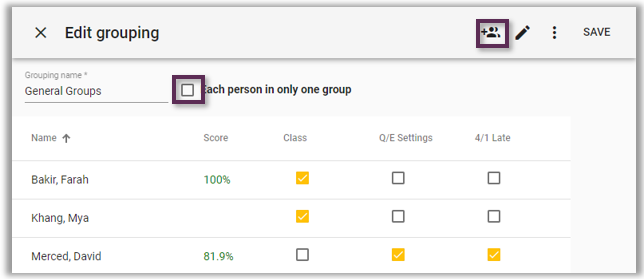
Optional Need: Select the group icon to add a new group and repeat the editing process to rename the new group if needed. In the example below, a new group was added because David is also a late arrival. In order to add David to both the Late starting group and the Q/E Settings group, the Each person in only one group box must be unchecked.
- Select Save » you will be returned to the Mange groupings view where the newly created group category ” General Groups ” is visible. If needed, you can always return to this view to edit or add new groups in the future by selecting the title General Groups.
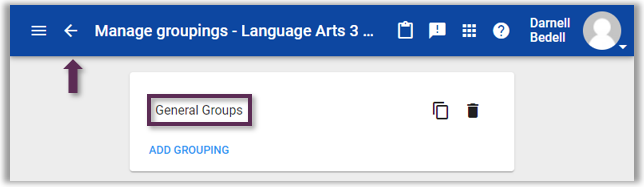
- Select the back arrow in the header to return to the Syllabus tab of the editor.
Related Articles:
Adjusting Quiz and Exam Attempts – Individuals
Hiding Content – Individuals
Assigning Alternative Activity – Individuals